Email Accounts in Thunderbird
Instructions for our clients who use Axmail email hosting
Find & Open Thunderbird
Thunderbird mail program has an icon like this:
Exact instructions depend on your computer's operating system & the version of Thunderbird that you have installed.
Edit Mail Account
If your email account is already in Thunderbird, here's how to update its settings.
Incoming Mail Server Settings
Thunderbird for Linux
Click on your email account name in the lefthand menu. Then click on Account Settings in top right corner of your screen.
Select Server Settings under the email account name.
Thunderbird for Windows
Click the hamburger menu icon in the top right corner and then choose Options, then Account Settings.
or
Click on the hamburger menu icon in the top right corner, then choose Account Settings.
or
Click on Account Settings in top right corner.
Click on your email account name in the lefthand menu. Select Server Settings under that account.
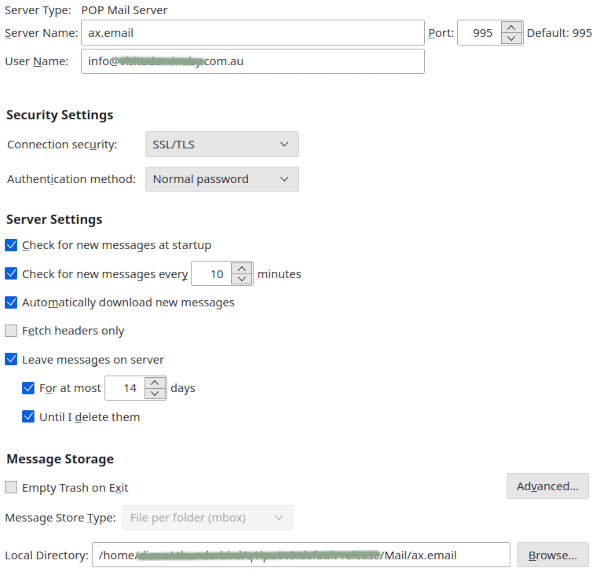
You should see something like this. I use Linux; you might not see exactly the same thing:

These incoming server settings are right for many of our clients.
If you have an IMAP account rather than POP, the Server Type will be 'IMAP' not 'POP' & there will be no option about leaving messages on the server for a limited time.
If you have a POP account & you get large email attachments or lots of mail, you might prefer to leave emails on the server only 7 days after first downloading them (not 14 days).
Outgoing (SMTP) Settings
Thunderbird for Linux
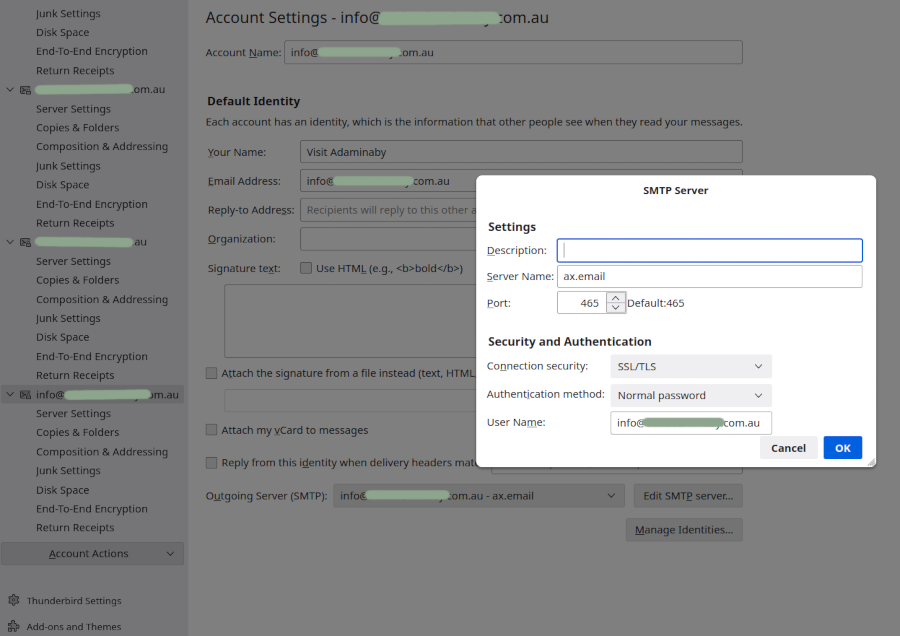
Click on the email account name in lefthand column. SMTP (outgoing) server is at end of the form that is displayed.
Click on Edit SMTP server.
Thunderbird for Windows
Click on Outgoing Server (SMTP) at the bottom of the lefthand menu (probably under Local Folders).
Look through the dropdownlist for your email account & its SMTP server. Click on Edit SMTP server.
You should see something like this:


